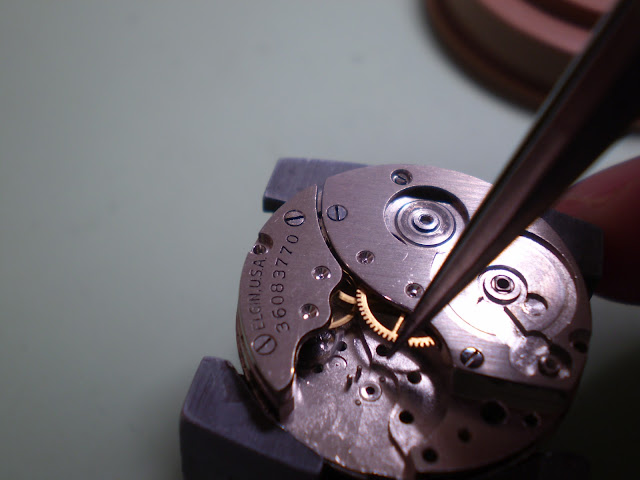
The Elgin Service Bulletin from 1950 suggests using Elgin M56b and vaseline. I use M56b - a bottle that's probably 50 years old - but I replaced the Vaseline with KT22. In addition, I use Nye Clock Oil for the mainspring, and Moebius 9145 for oiling the pallet stones.
First the mainspring. The old blue steel spring was completely worn out, so I replaced it witha NOS Durapower spring. Here's the spring, the barrel and arbor, and my K&D mainspring winder.
First, you attach the arbor hook of the mainspring to the winder's arbor. Then put the arbor into the winder.
Wind the spring into the winder leaving the barrel end out, then turn the arbor backwards to disengage it from the arbor, and pull it out. Carefully insert the barrel end so that the end engages the hook in the barrel and push the spring into the barrel.
Insert the arbor and turn it till the hook engages the spring, then put the barrel cap on, lining up the slot for the T-end.
Next, I install the cap jewels in the plate and the balance cock.

Next I oil the balance jewels. First put oil (M56b) in the cup, then push it through with the fine wire end of the oil inserter.
Next I put the barrel in the well in the pillar plate.
Now add the train, working backwards from the escape wheel.
Add the set lever screw and put on the barrel bridge, making sure the center and 3rd wheel pivots are in the bushings.
Next install the train bridge, making sure the 4th and escape wheel pivots go into the holes. When To make sure the pivots are in place before tightening the screws, give the center wheel a spin to see if the whole train spins freely.
After lightly greasing where the crown wheel rubs on the barrel bridge, install the click spring, the click, the ratchet wheel, and the crown wheel and washer. Remember the crown wheel screw is threaded backwards - lefty-tighty/righty-loosey! Once this is done, you can turn the ratchet wheel a few clicks and watch the train. It should spin, then stop and spin backwards, coming smoothly to a stop, not stopping suddenly, nor turning slowly as if against drag.
This is a good time to lube the escape wheel teeth.
Next I add the keyless works. First, though, I oil all the lower pivots. The third wheel pivot is inaccessible after you install the minute wheel clamp, and also you can very lightly oil the center wheel post before installing the cannon pinion.
After the cannon pinion, I install the minute wheel, setting wheel, clutch spring, clutch and bevel pinion.
Once the clutch lever and minute wheel clamp are installed, you can insert the stem.
On the left it's in winding mode, on the right in setting mode. Note the position of the clutch.
Turh the movement over again, and install the pallet and pallet bridge. Make sure you can see the pivot in the bushing before tightening the screw.
At this point, I wound the mainspring up a bit, only to discover the ratchet wheel kept slipping. I found that the corners of the square on the barrel arbor that engages the ratchet wheel were worn off, as was the hole in the ratchet wheel I replaced both with parts from a spare 554. Here's the worn out barrel arbor on the bottom, compared with the good one from the 554 on top.
Back to the reassembly! First, install the balance in the balance cock.
Then lower the balance into place and when the balance is in place and oscillating, tighten down the screw. Wind it up and you've got a clean, running, lubricated watch movement!


That looks like some crazy meticulous work there, doug. Kinda cool, in a geeky sort of way ;-)
ReplyDeleteWatching this is helping me learn! I love your site!
ReplyDelete