The first B.W. Raymond movements were 18 size, key wind and key set, 15 jewels, straight-line lever escapement, fast train (18,000 bph). They had a bimetallic balance and were adjusted for temperature. Elgin's other offerings had right-angle lever escapements, slow trains (16200 bph), and were not adjusted. Some had 15 jewels, some had 11, most had 7. Some had solid steel balances, and some had fake bimetallic balances, with no cut to allow expansion.
When putting together their parts catalogs in the late 19th/early 20th Century, Elgin retroactively assigned grade numbers to their 'Name' grades from the early years. The very first movement, the B. W. Raymond, was assigned Grade 69. Grade 69 was produced for 14 years, with over 29.000 built.
Recently, I became interested in acquiring an early Elgin, so when a Grade 69 B. W. Raymond, with a serial number below 130,000, and RUNNING came up on Ebay with a good Buy-It-Now price, I jumped on it!

It's in a 'Silverode' (nickel) case, definitely not original to the watch. There is another screw mark, about 90 degrees counterclockwise from the case screw in the movement.

Once you unscrew the case screw, the movement comes out through the front of the case. Note the pin sticking out from the pillar plate. That goes into a hole in the dial side of the case to locate it, then the case screw snugs it down.

The dial is held on by three brass taper pins that go through crossdrilled holes in the dial feet. You can see one of them in between the two pillars on the Pillar Plate (lower). Pull those out, and the dial comes off - assuming you've removed the minute and hour hands first!

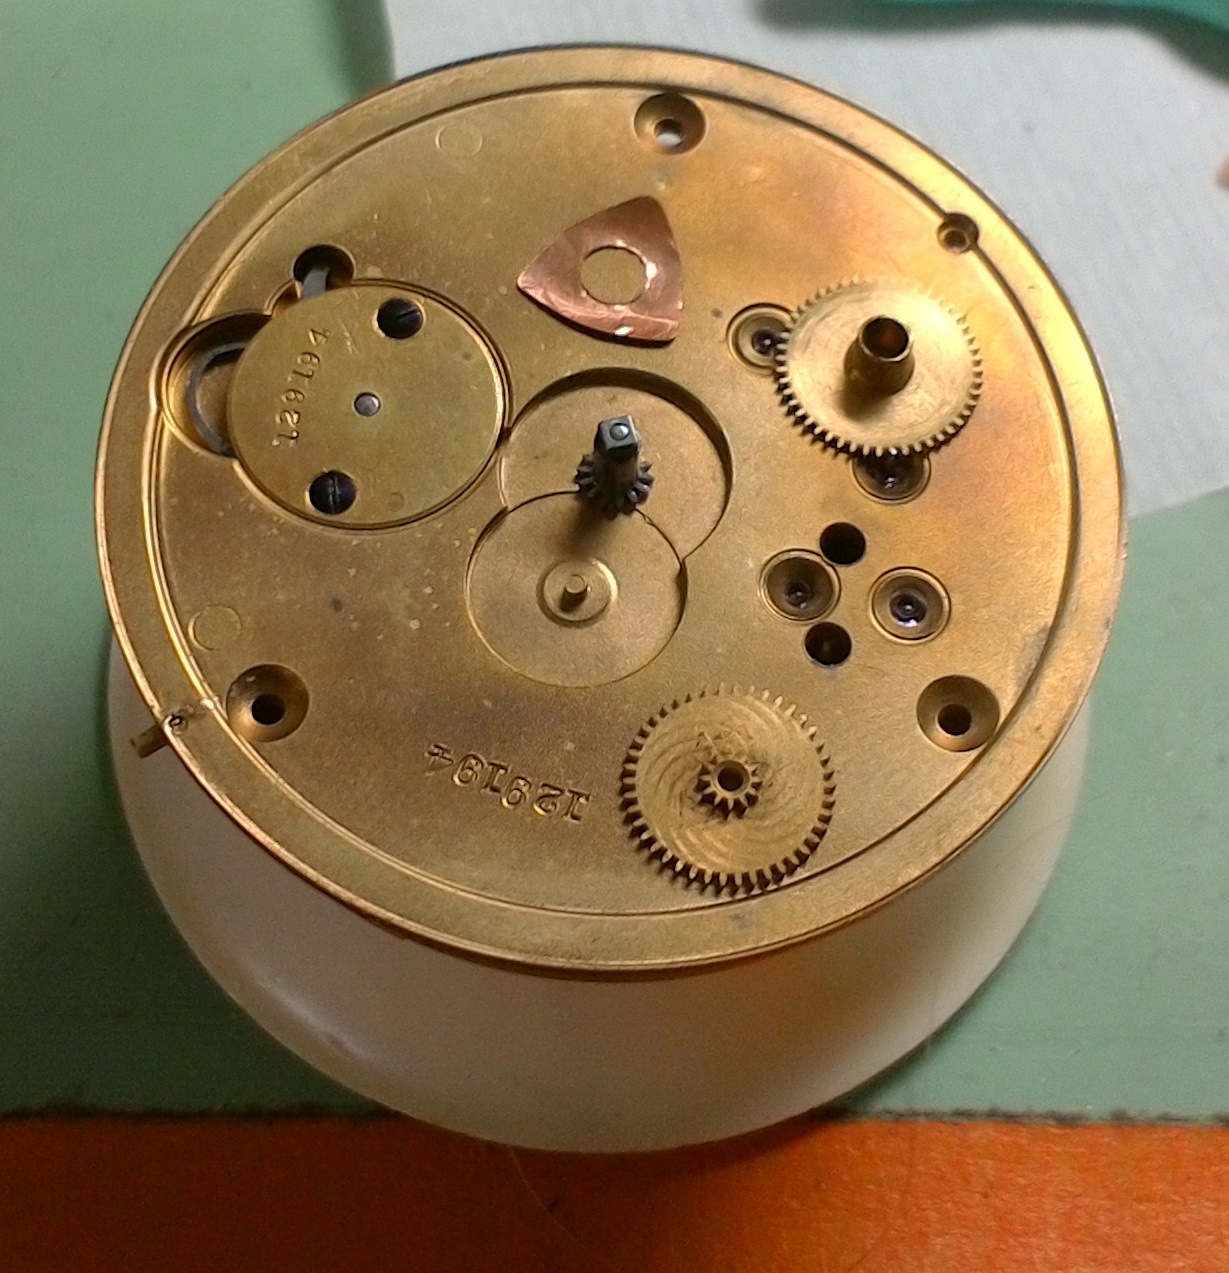
Without the dial, you can see just how simple the setting works are. Note the square on the top of the cannon pinion. Put a key there, and turn to set. Simple!

You can also see that there are jewels in the pillar plate to match those on the top plate.
The movement disassembles pretty easily - essentially the reverse of the assembly which I'll show later. One important point to remember with any full plate watch is to remove the screws that hold the top plate in place, then flip the movement over and lift the pillar plate off. This prevents breaking the pallet. We'll see why later.
Even though the American watch industry was built around the large-scale production of identical watch parts by machinery, in these early watches, many of the parts were stamped with the serial number, perhaps because they weren't REALLY interchangeable! Here are all the numbered parts from 129194. Note that they're ALL from 129194! This may be the equivalent of a vintage car with Matching Numbers! Note that the barrel and barrel cap are stamped. Even the hour wheel!

As I took it apart, it was apparent that it had been cleaned and oiled quite recently. In retrospect, it might have been best to leave it alone, but that wouldn't have provided such interesting pictures!
Cleaning was done as usual - polish the jewels with pegwood, including pegging out the holes. Clean pivots in pithwood, before running through the L&R Master.
First step in reassembly is to replace the cap and hole jewels in the balance cock and potence. 'What's a potence?', I hear you asking. Well, it's essentially a foot for the balance. It holds the lower jewels, and has an opening for the pallet fork. It screws onto the underside of the top plate.

Next the balance cock.

Now I like to put the balance in place and check the freedom and the 'breathing' of the hairspring. In this case, you just put the balance and cock in place on the top plate, without the pillar plate.

Next I oil the balance jewels, as I've done elsewhere with fixed jewels - put a little oil in the cup side of the hole jewel, then push it through with a fine wire.
Now that the balance jewels are oiled, we're ready to put it all back together~

Next step is to put the ratchet and click assembly together. It all goes on the dial side of the pillar plate. Once you grease the click post, the click spring goes in place first, then the click and the ratchet wheel. The last you simply place in the recess, since there's nothing to hold it till the barrel goes in place later. The recess below the lefthand side of the click is how you let down the spring. There's a hole in the side of the pillar plate where you insert a small screwdriver to disengage the click, while holding a key on the winding square of the barrel arbor.

A plate covers it all - and it's also stamped with the serial number!

The next step is to put in the train. Because of the potence, it's MUCH easier to build it upside down. That is, place the pallet and wheels into the jewels on the top plate, then place the pillar plate on top of it. Note how the for of the pallet goes into the opening in the potence.

Next add the escape and 3rd wheels.

After adding the 4th and center wheels - with the long posts UP! - place the pillar plate. Sight through the center hole to place the center wheel post. The rest of it is just jiggling the pivots of the 3rd, 4th, and escape wheels and the pallet into place. Then the pillar plate should drop into place. Make sure you see all four pivots in their jewel holes!!!

Now the tricky part - you have to flip the whole thing over while holding it together! Once that's done, you can add the screws for the first two pillars. If you look in the off-center hole, you can see the lower balance jewels and the pallet fork. On the right, next to the center wheel, the keyhole-shaped opening is for the lower end of the barrel arbor.

The barrel arbor has a square shaft with a cylindrical tip, which goes into the hole in the ratchet wheel cover. This model may have originally come with Geneva Stopworks, a system to prevent both overwinding and excessive rundown of the mainspring, but they're gone now! You can still see the recess where they went.

Place this side down in the recess, and using a key, gently turn the square upper end of the barrel arbor until the barrel drops into place.

Add the barrel bridge and screw it down. Installing the balance and cock is like any other movement - start with the roller jewel on the far side of the opening in the pallet fork, drop the balance into engagement, and rotate the cock relative to the movement until it's in place to install. Making sure the balance is turning, so it's free, as you screw down the cock screw. Now you're ready to wind it up!

I had noticed when testing before disassembly, that the cannon pinion was slightly loose. This allowed the minute and hour hands to sometimes stop, or run slowly despite the otherwise reasonably accurate rate. So I used an old trick - a hair through the cannon pinion when you install it! Here's the dial side, ready for the dial train.
The dial goes back on the same way it came off, with the taper pins. Then the whole thing goes into the case. Place the pin in the hole at 11:00, then flip over to screw down the case screw. It's a bit of a pain, since it's a half-head screw. You have to hold the movement by the dial side to lift it so that the case screw can be tightened properly.
Placing the hands is a little bit more complex. The minute hand has a square hole, and it's not set up so that the hand is at one of the corners. You need to set the cannon pinion so that when the minute hand is placed it will be at 12:00, then install the hour hand exactly at an hour, then install the minute hand pointing at 12:00.

So there you have it - the first model of Elgin B. W. Raymond! Here it is with the LAST model of B.W. Raymond pocketwatch, the 571, and the first B.W. Raymond Railroad Wrist Chronometer, the 730A.
