Sunday, December 23, 2012

Technological Marvel, or Lemon?


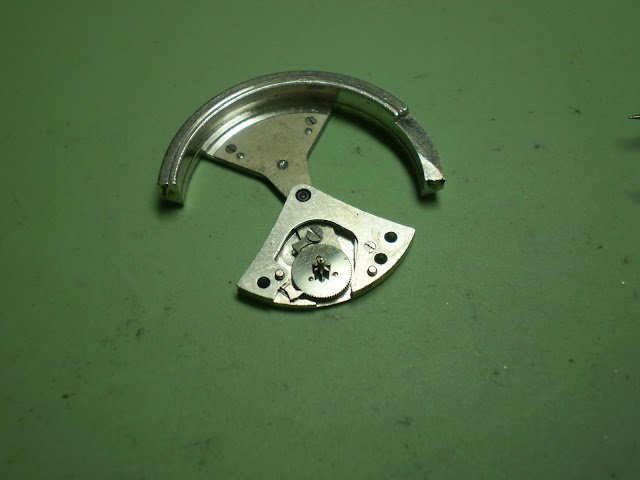
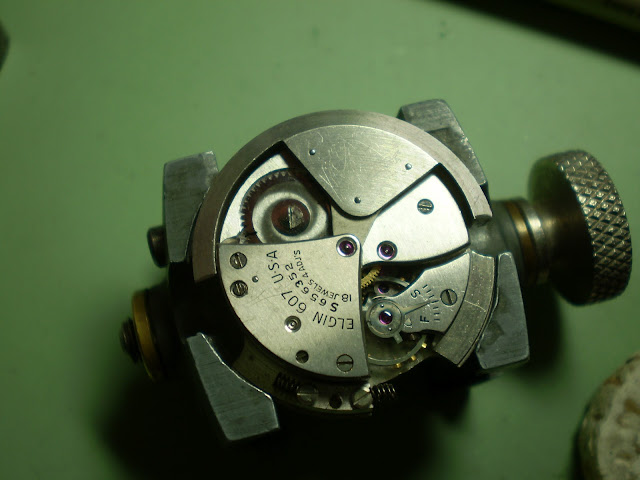
One complaint against the automatic watches of the 1950s was how thick they were.  This is because they often took a movement with a stacked, concentric 4th wheel and then added the selfwinding works on top of that, resulting in a movement nearly twice as thick as standard manual-wind, subsidiary seconds movements.  And of course, there needed to be room in the back for the rotor to spin freely.
Compared to manual-wind watches, automatics of that era were just plain chunky.  Here's an Elgin 607 Bumper next to an Elgin 687, one of the 8/0 series of manual wind movement.  Note just how much thicker the 607 is.


Buren tried to address this with their Microrotor movements.  These are found in Hamilton's Thin-o-matic series.  Their approach involved putting the time train and the self-winding works on the same level.  The winding is accomplished by a small rotor rather than a movement-sized rotor.   You can see it on the left in this picture.


 Some of these movement used an off-center center wheel for more space, which drives the minute hand indirectly.  One complaint about these micro rotor movements is that the smaller rotor doesn't always fully wind the mainspring, especially when the watch is older or in need of service.

This is likely why current automatics use a full sized rotor.  Of course in these days of big watches, the thickness of the movement is no longer an issue.  Most watches dwarf the movements they contain!

Eight years after Elgin abandoned the 607/618 'Bumper' automatics, they introduced a new series of American-designed and -built selfwinding movements, the Durabalance Automatics.


 In designing these, it seems as if Elgin started with a blank sheet of paper, and did not follow the conventions of other automatics.  These movements were technologically advanced and cleverly designed, incorporating several advances.

  First, the Durabalance, a mass-produced free-sprung balance with an ingenious method approach to regulating the rate.  As I described in an earlier post,  in the Durabalance a pair of weights (d) hooked over the spiral balance arms (b) are connected via a flat leaf spring (c).  Moving the spring causes the weights to move along the balance arms, increasing or decreasing moment of inertia and thus decreasing or increasing the rate.

Brilliant idea, but in practice the tolerances are loose enough that the poise of the balance is not always right because the weights don't move in exact coordination.  Also, regulating the watch requires you to stop the balance and hold it while you move the spring one way or another.

Like the Buren microrotor, the 760/761 series put the selfwinding works on the same level as the time train, making the movement itself much thinner.  Unlike the Buren, however, the 760/761 used a full-sized rotor.  Whereas other automatics have a bidirectional clutch in the selfwinding works, the 760/761 put the clutch in the rotor hub.  The clutch itself was unique, incorporating 6 round, flat jewels that transfer the motion of the rotor to the selfwinding works via gears A and B.


The jewels themselves are housed in asymmetrical openings in Driving Gear A and Assembly B.  Looking at A, when the rotor is spinning counterclockwise, each jewel is pushed to the narrow end of the slot, where it wedges in and transfers the motion of the rotor hub to the driving gear.  When the rotor turns clockwise, the jewel is pushed to the larger end of the slot, where it spins, allowing the gear to freewheel.  Assembly B is set up in the opposite direction, so that clockwise motion drives Assembly B and its associated gear while Gear A freewheels


Gears A and B can be seen in this picture


This also shows the clamp and clamp screw which fix the rotor to the rotor post.  Gears A and B mesh with different parts of the  autowind mechanism

R is the rotor post
1 is the First Autowind Wheel
2 is the Second Autowind Wheel
3 is the Rotor Idler Pinion
4 is the Click

Gear A meshes with Rotor Idler Pinion 3, which in turn meshes with First Autowind Wheel 1

Gear B meshes directly with First Autowind Wheel 1

First Autowind Wheel 1 drives Second Autowind Wheel 2.

We'll get to what Second Autowind Wheel 2 meshes with later.


The Click (4) works on First Autowind Wheel 1, rather than on the ratchet wheel.  Where's the ratchet wheel, you may be asking.  We'll also get to that later!


Here's how it works.


When the rotor turns clockwise, Gear B is locked, so it turns as well.

It turns First Autowind Wheel 1, driving Second Autowind Wheel 2

The Rotor Idler Pinion spins clockwise, while Gear A of the rotor freewheels.


When the Rotor turns counterclockwise, Gear A is locked and turns with the rotor.

Gear A turns Rotor Idler Pinion 3 clockwise, which turns First Autowind Wheel 1 counterclockwise, driving Second Autowind Wheel 2.

Gear B freewheels.


So, how does this wind the mainspring?  For that, we have to look at the dial side.


The Pinion of the Second Autowind Wheel drives the Ratchet Idler Wheel A, which in turn drives the Ratchet Wheel B.  That's right - the ratchet wheel is on the DIAL SIDE!

This is to accomodate the winding and setting mechanism, which uses a rocker plate instead of clutch.  With the Rocker Plate in winding mode, the Winding and Setting Wheel C turns the winding wheel D, turning the Ratchet Wheel B and winding the watch.


Remember how the Click works on the First Autowind Wheel?  It's the only thing holding the ratchet wheel.  The full force of the wound mainspring is on the Ratchet idler wheel, the Second Autowind Wheel, and the First Autowind Wheel.  BTW, if all is working properly, hand winding the watch spins the rotor.


To set the time, pulling up the stem causes Setting Lever A to push the Rocker plate so that Setting Wheel B meshes with Hand Driver Wheel C.

The Hand Driver Wheel is frictioned onto the off-center Center Wheel, much like a Cannon Pinion in an ordinary watch.  It drives the Minute Wheel, which in turn drives both the Hour Wheel and the Cannon Pinion, which simply slips down over a post in the center of the movement.


The Train, despite its off-center Center Wheel, is fairly standard.


Here you can see the Escape, Fourth, and Center Wheels.  The Third Wheel is obscured by the Center Bridge Plate, which carries the Rotor Post as well as the Rotor Idler Pinion Post.


With the other wheels removed it's easier to see the Third Wheel.


With the Center Bridge Plate removed, you can see the Sweep Second Pinion, engaging the Third Wheel.

The sweep second hand is driven indirectly.  Often sweep second hands driven this way will skip or jump.  This is because wheel teeth are designed to be driven smoothly by pinion teeth, but not to drive pinion teeth, so the pinion moves in a jerky fashion.

To cure this, there is a bronze washer underneath the pinion gear, which pushes the pinion up so that the top of the pinion contacts the bottom of the Center Bridge Plate, providing just enough friction to keep the pinion teeth properly meshed with the Third Wheel teeth.

It's effective - of all my 760s and 761s, only one has had 'jerky' second hand motion.  I suspect the washer is missing or needs to be bent to provide more tension.

So, with all this, how does the Durabalance automatic stack up, thickness-wise?  Here it is compared to the 687 and 607 from way up above.  As you can see, it's much thinner than the 607, and pretty close to the 687!


And there you have it - the Durabalance Automatic, one of the only automatic watch movements completely designed and built in America.


 Now, about the 'Lemon' part.  As innovative and unique as these are, there are several design flaws that plague them, and which anyone hoping to collect these needs to be aware of.  I've bought at least 11 of these, either as watches or as movements.  Only 4 were in running order when I got them, and I've managed to get 2 others working.  Below are the broken parts from the other movements.

Going clockwise from the upper left:

A.  Lower Center Wheel jewel popped out - it's the little 'Cherry Life Saver' by the arrow point.

B.  Center Post popped out.  To be fair, this movement looked like it had been run over by a tiny truck, right down to a tiny tire track across the dial.

C.  Loose Rotor Hub.  I've had three of these. If you look at the rim of the rotor, you can see where it rubbed on the plate.

D.  Broken Minute Wheel Clamp.  The little arm at the top broke off of the little piece at the bottom.  According to more several professionals, this is a frequent problem.

E.  Second Autowind Wheel.  This piece is one of the two most frequent problems.  Among these 4 wheels, 2 have broken lower pivots, 1 has missing teeth on the pinion, and 1 has a broken wheel.  Remember that odd click arrangement?  I suspect this is the weak link in that particular chain with all the force on that poor little pivot.

F.  Missing Teeth on Winding Wheel on Rocker Plate.  In my sample, this happens as often as 2nd Autowind Wheel issues.  I wouldn't be surprised if there was a link between that and the 2nd Autowind Wheel weakness, and perhaps breaking one leads to breaking the other.

E.  Loose Rotor Post.  On these two Center Bridge Plates, one has a loose rotor post, and the other has had a repair attempted. 

So many of these particular parts have failed that spares are very hard to come by.

The Durabalance Automatic, then, is a fantastically innovative movement, very different from other automatics, with a number of novel features, but with at least 3 Achilles Heels.  Any collector is well advised to purchase only fully working examples, and perhaps a couple parts movements as well.  And have it professionally serviced!

UPDATE:  After Brian's comment, I wanted to add a note to collectors and potential collectors about hand winding these watches - BE GENTLE!! 

I believe that hand winding these watches is supposed to spin the rotor, which puts a lot of strain on the teeth of the rocker plate wheel (F), as well as on the 2nd Autowind wheel (E).  This may be what causes their frequent failure.  So, wind carefully, and don't wind much. Just start it and then depend on the autowinding.

Sunday, October 21, 2012

A Whole 'Nother Size of Elgin

Prior to 1938, Elgin wrist watches simply had 'Elgin' on the dial.  There was no way, short of knowing the models or peeking inside the back to know whether it was running a 7, 15, or 17 jewel movement.

In 1938, Elgin introduced the Lord Elgin series of wrist watches.  These were a premium product, with 21 jewel movements, and cased in 14k gold filled or solid gold (and a few in platinum).  As I've shown in previous entries, the finish on the movements was also of a higher grade.  Elgin continued to sell the 7, 15, and 17 jewel watches as well, taking no effort to distinguish them from each other.  It wasn't even always clear from the ads what the jewel count of the movement was.

(The Lord Elgin name had previously been used on some of Elgin's pocket watch movements, but only on the movement, not the dial.  In their 12s 'Streamline' series of watches, for example, there were two different Lord Elgin movements, the 450 and the 451.  These were 21 and 19 jewel movements, with gold trains and jewel settings. 
This is a 19j 451.  Note 'Lord Elgin' on the train bridge.

Prior to that, some of the first watches cased at the Elgin factory seem to have been the 'Lord Elgin' series, which were 14s, and thinner than others.  I believe there were even earlier examples as well.

In 1941 (as near as I can figure it), Elgin introduced the 'Elgin DeLuxe' wrist watch line, and I believe they also stopped making 7 jewel watches (apart from those made for the Gov't.).  They now had three levels of quality:  Elgin, which denoted a 15j watch; Elgin DeLuxe, which denoted 17j; and Lord Elgin, denoting 21j watches.  I'm in the midst of either collecting or cleaning the first series of Elgin/Elgin DeLuxe/Lord Elgin groups in the wrist watches, so I have no complete series to show...yet.

But!  At the same time Elgin introduced the Elgin/Deluxe/Lord division, they also introduced a new line of 10s pocket watches.  These contained newly designed movements, rather than reengineering old ones. These watches were smaller and thinner than 12s watches that had previously dominated the 'dress pocket watch' market.  And Elgin made them in the same 3 levels as the wrist watches.  Curiously, they did not carry this through to their 16s watches.

The movements were the 15j 546 in the 'Elgin' line, the 17j 542 in the 'Elgin DeLuxe' line, and the 21j 543 in the 'Lord Elgin' line.

Here's a 546 from 1941-42, in rose gold.


A 17j 542 Elgin DeLuxe, also from 1941-42


And here is a 21j Lord Elgin 543, from 1949.


The 543 may have continued production beyond 1955.  I have seen two examples without serial numbers, and Elgin stopped putting in serial numbers after 1955 or so, when they reached 56,000,000 watches.

The difference in finish among the 3 movements is more apparent in this picture...


Here you can see that the 546 has a flat, brushed finish, whereas the 542 and 542 have a brighter satin finish.  Each grade has its own distinctive finish on the ratchet wheel as well.  And of course, the 21j 543 has a cap jewel on the escape wheel and pallet, and a micrometric regulator.  Note the cutout in the case to the right of the balance cock for the adjusting nut.

There's another salient fact about this series of movements.  They are not so much pocket watch movements in the vein of Elgin's long line of pocket watches.  They have more in common with Elgin's wrist watch movements.  If they look familiar to any of you who have ever worked on an Elgin 8/0, it's for a reason.  Allowing for the different layout (open face for the 10s vs hunter for the 8/0) they're essentially the same, on a larger scale! 


.


This is even more clear at the level of the parts.  Not only are all the same parts there in both, they are all almost the same SHAPE!  It's like the 10s PWs are just overgrown 8/0 wrist watches!


NOTE!  I inadvertantly left out the clutch spring on the 8/0 (the smaller shepherd's crook-looking thing under the pillar plate), but trust me, it's the same thing in miniature.

These watches are a bargain these days, as are most 12s and smaller pocket watches.  BUT, they fit the watch pocket in a pair of Levis perfectly, and they keep excellent time.  And since they have all the same bits in the same places as an 8/0, they make excellent practice watches, to build your confidence before tackling a wrist watch.  On the other hand, if you've been working on wrist watches, these are EASY!

Tuesday, October 9, 2012

You may have been asking yourself, 'How come Doug hasn't posted any new things lately?'

Well, here's the answer - We've been preparing for a new addition to the family.  No, not THAT kind!  The furry kind.

The big boy on the left is Rango, (formerly Astareleventh St.), a retired racing Greyhound.  We picked him up this weekend, so of course it's been a busy time getting ready.  The dog on the right is Zeena, another retired racer who's been with us for 4 years now.

I'll get back to watches later this week, I promise!

Thursday, September 20, 2012

Thoroughly Amateur Restaffing

One of the down sides of bottomfeeding - buying watches listed on Ebay as 'nonrunning' or 'ticks' or 'runs but stops' - is that while many of them just need cleaning, or a new mainspring, or a simple part swap, a fair number have broken balance staffs.  I've been able to get by for a long time buy snapping up parts movements whenever I can get them for cheap.  Many of these have good balances. 

Still, my supplies of spare balances in good condition has been dwindling over time, and for some families of movements, I simply have none.  At the same time, I've built up a backlog of balances that have good balance wheels, hairsprings, and roller tables, but have one or both pivots broken.

One thing that stopped me was my lack of a staking set. Staking sets are de rigeur for any kind of serious watch work beyond simply cleaning and oiling.  And they generally go for a significant chunk of change.  For a long time, this stopped me.  Fortunately, Cary Hurt, a highly respected collector, came to my rescue, offering to swap me a staking set for my servicing a handful of his watches.  It was an offer I couldn't refuse, but I think I got much the better part of that deal!!

I obtained New Old Stock (NOS) Elgin balance staffs for most of the watches I collect, and with the arrival of the staking set from Cary, and a K&D Balance Staff Remover, I was set.  For my first restaffing, I decided to do an Elgin 555 given to me as a project by Scott Allison of Times of Plenty, a dealer in NOS vintage watch bands and bracelets.  I had taken down and cleaned the rest of the movement some time ago, discovering right off the bat that the balance pivots were both gone...

What I had not noticed was that the roller jewel was also absent.  So I found ANOTHER busted Elgin 554 series balance with a GOOD roller table.  You can see the roller jewel, right where it should be....
Before removing the old staff, you first have to remove the hairspring and roller table.  To remove the hairspring, I made myself a homemade collet tool.  I took a heavy gauge sewing needle and stoned it down to a long, thin wedge with a flat tip, like a screwdriver.  I chucked it up in my pinvise, to give me a handle to hold.  The thin end of the wedge is inserted into the slot in the collet right up against the staff, and then turned while lifting, to lift the collet off.  

This didn't work for this balance, for reasons I later discovered*.  So, I ended up using another approach - I inserted the tool underneath the hairspring and gently pried up on the collet till it came off.  This needs to be done VERY CAREFULLY!  But then, everything in this procedure does, too.
  Once the hairspring is off and safely stowed, it's time to remove the roller.  The staking set has a roller remove.  This tool fits into the riveting plate of the staking set, then you place the fingers over the balance arms, and under the roller table, and tighten until it's held in place.

Then, you select a pivot punch that just fits the cone of the balance staff tip, use it to center the work, and lock the riveting table in place. 
A few light taps will push the balance off the roller.
 Next, find the smallest hole in the rivetting table that holds the hub without binding.

Use the centering punch to center the work, and lock the table in place.  Now it's time to get your staff remover.  This is a tool that fits in the space between the gooseneck and the rivetting table, and clamps the balance arms down, so they THEORETICALLY won't be deformed when the staff is knocked out**.   
The large knurled part unscrews all the way up to the gooseneck, then the stem of the smaller knurled part is used to clamp the tool down.  Before you do that, though, you need to push the stake down through the goosneck and the remover, to make sure it's all lined up perfectly.  There's a window to check that the stake is run down all the way to the balance pivot.

With everything clamped in place, a single, sharp hammer blow should drive the staff out, shearing off the rivet and leaving the balance wheel THEORETICALLY unharmed.

Sometimes, theory and practice are the same!  See the little ring?  That's the rivet.

The old, busted staff is still useful!  You use it to find flat nose and round nose hollow punches that will JUST fit over the collet side of the staff without binding.
Next you use it to find a hole in the rivetting table that will JUST hold the staff below the hub without binding.  Use the center punch to center it, and lock the table in place.  Insert your NEW staff in the balance wheel, making sure the rivet stands above the balance arms, and place it in the hole in the table.

Now, lower the round faced punch down to the work.  At this point you may need to adjust the centering - I did!.  Gently slide the punch down over the staff to the rivet.  


Strike the punch with a series of blows, turning the punch a little after each blow.  Using tweezers, and holding the punch down firmly so it doesn't turn, grasp the rim of the wheel and try to turn it.  If it turns, you need to repeat, but striking harder, until the balance is held in place by the staff, indicating the rivet is has been rolled over and is holding the balance to the staff. 

Once that's done, replace the round faced punch with the flat faced one, and flatten down the rivet.


Next, I tested the balance for how freely it would spin in the movement.  With the pallet and train bridges removed, I installed the newly staffed balance, sans roller and hairspring, in the movement.
Using a brush or a blower, start the balance spinning...

It should spin freely for a LONG time, only very gradually slowing to a stop.  Ideally, there should be no sound of rubbing or other interference.  

Time to install the roller table!  First, place the roller over the roller post.  It should come most of , but not all the way down to the hub.  Align the roller jewel perpendicular to the arms, place the lower pivot in the same hold you used for riveting.  Now, put yourself in a position to see the gap between the roller table and the hub, and while watching this gap LIKE A HAWK!, gently drive the balance down onto the roller with VERY light blows, stopping as soon as the gap disappears.

Now to true the balance!  I have an old K&D truing caliper, and I gently place the balance into the side which grasps the cones of the staff tips.  Tighten down carefully until the balance is free to move, but doesn't spin freely.  Adjust the indicator close to the rim of the balance, and as you slowly rotate the balance, observe whether the width of the gap changes.

In my case, one side was higher.  I pushed down in that side slightly, since the Elgin Manual says not to push UP lest you pop your wheel off the staff.  A few nudges, and the balance was trued in the flat.  I also checked it in the round, but since it's a solid balance that was not an issue.

For the next part - poising - I used the other side of the calipers, the side with holes that hold the pivots***. The balance should spin freely, but stand still at any point you stop it.  Mind did.

Next, the hairspring is installed.  After placing the collet over the hairspring post, a punch is used to gently push the collet down to the hub.

Now the balance is restaffed, trued, and poised!  Time to put the movement back together!!

And...

              And...

IT'S ALIVE!!!!

*  It turned out the collet was loose on the staff, which is why trying to spin it off didn't work. I discovered this when I tried to adjust the beat - how close the roller jewel is to perfect alignment with between the balance and the pallet pivots when at rest.  

I found that the amplitude was changing as I watched, and when I tried to turn the collet, it moved too freely.  I removed the hairspring, placed it on my bench block, and used a concave punch JUST larger than the collet.  A few light hammer blows tightened it right back up.

**  REAL watchmakers almost without exception are trained to use a lathe to cut the balance off the staff from the hub side.  This is less likely to cause deformation of the balance arms, and is over all much gentler on the balance.  Then again, a lathe makes staking set look cheap!

***  I am reliably informed that a truing caliper is pretty much useless for poising, and that one should use a poising tool.  These are not expensive, and I now have one.  Another alternative is to place the balance with the roller table in the movement (without the pallet and train bridge), turn it sideways, and see if the balance tries to roll to the same point, or if it will stand at whatever point you stop it.

Saturday, September 8, 2012

Bumper Part 2 - the Rebuild

In the previous post on the Elgin 607 Bumper movement, I had taken apart a movement that I'd bought on Ebay.  It was sold as nonrunning, but was nice and complete.  In the interim, I ran the parts through my new (well, new to me!) cleaning machine, dried them, polished the jewels and pivots with pegwood and pithwood, and inspected all the parts.

 
Since I have acquired five 607 mainsprings in the course of buying mainspring lots, I thought I'd pop in a new one.  You can see the braking spring, a tiffer piece of spring that essentially grips the barrel wall, but allows the spring to slip to prevent overwinding.


This was kind of a pain, because you have to stop after winding most of the spring into the winder, then fold the braking spring under so it gets pulled into the winder, and unlike a spring with a barrel end hook or T-end, you want to wind the whole thing into the barrel.

Next, I reassembled the autowind module.


The trickiest part was remembering how this part went together.  That lone screw holds the pawl spring at one end, and there's a groove in the winding sector that the spring fits into.  The fingerprint on the bench block will give you some idea just how SMALL the parts are - the 3 screws holding the  winding sector hub together are about the size of balance cap jewel screws. 


Once that's put together, the ratchet pawl is added to the plate. (sorry about the focus)


Then the winding sector assembly is added.


Add the lower plate, and it's ready to go!

I won't show the assembly of the movement, which is really pretty straightforward, not to mention just like the disassembly only backwards.  I was pleased to note that the balance took right off when installed.  The next step is to add the bumpers.  This is a fiddly step, since the bumper block doesn't have separate screws.  The same screws that hold down the springs attach the bumper to the pillar plate.  And of course, the springs try to turn as you tighten the screws down!


With the bumpers in place, you just add the autowind module and tighten two screws.

  
Note the little black mark on the ratchet wheel.  I marked that so I could see if moving the winding weight worked to wind the watch.  As you can see in this picture, where it's moved about 90 degrees, it does!!


 Add the dial and hands, and we've got a newly cleaned Elgin 607 Bumper!  A nice little piece of American Watchmaking history!